Sunday, December 1, 2013

Parmesan Cream Cheese Dip: Thanksgiving Edition!

I hope that you are all in good health and high spirits! I fled Baltimore this week to spend time with my awesome family and fiance, Travis, in Atlanta. Travis and I are both devoted foodies.. well, foodies in the sense that I cook and he eats. Our favorite moments spent together are buying ingredients for recipes and eating the final product while we watch some ridiculous tv show. As this week was Thanksgiving, we decided to whip up one of our favorite appetizers for the family to eat while waiting for the other food to finish cooking. This is a recipe that I tried a few years ago (original recipe), but we have since added ingredients to create a richer flavor for the holidays.


WHAT YOU NEED: 
1 1/2 cups milk 
1 1/2 cups grated Parmesan cheese 
1/2 cup dried Romano Parmesan cheese 
16 ozs cream cheese (cubed) 
2 tsp minced garlic 
1/2 cup of chopped green onion
cracked black pepper to taste 
1 large loaf of sourdough bread (cubed) 
1 circular loaf of bread to act as a serving dish (optional) 

Cut out a large circle in the center of your circular sourdough loaf. Remove additional bread from it as necessary in order to create a bread bowl. Set aside.

Under medium heat, stir the milk and grated Parmesan and Romano until melted in the pot. Gradually add the cubed cream cheese, garlic, green onions, and bacon bits. Stir until smooth. Allow the ingredients to cook together for about 7-10 minutes on simmer, stirring occasionally. Chill the mixture in the fridge for at least 1-2 hours or until cool. Pour the mixture into the hollowed out bread bowl. Garnish the sides of the bowl with the green peppers and tomatoes. Dice your other loaf of sourdough bread and serve. Don't be afraid to eat veggies or other varieties of bread with this dip! 
We didn't use the bread bowl this time around. I'll update the picture at a later date with a fancy bread bowl :)

Enjoy the wonderful Thanksgiving weekend and I'll see you next week!


Tuesday, November 5, 2013

Cinnamon Cupcakes with Ginger Frosting


Happy November! This week I wanted to try my hand at baking cupcakes. I've actually never made them before. I think I've always believed that cupcakes are like playing with dolls - the older you get, the more childish they seem. Saturated in frosting, too much sugar in the batter, etc. In my mind, I equate cupcakes with hyper children like Honey Boo-Boo and that's a huge deal breaker for me. Cake and pie - now that's grown folk food! However, in light of the growing designer cupcake trend and cupcake competitions, I figured I'd give it a try. 


In honor of November, I wanted to put a few of my favorite fall spices together; cinnamon, ginger, and cayenne pepper. I used the ginger and cayenne to give the cupcakes a spicy kick. 


WHAT YOU NEED (yields approx. 12 cupcakes, 24 mini-cupcakes)

2 cups flour 
2 teaspoons baking powder 
1/2 teaspoon salt 
1/2 cup butter, softened 
3/4 cup sugar (if you like your cupcakes very sweet, add a little more.) 
2 eggs 
1 cup milk 
2 teaspoon vanilla extract 
1 1/2 teaspoon cinnamon

Frosting:

1-2 containers of buttercream frosting (easy! or you can make your own using Quick Vanilla Buttercream Frosting recipe)
2 teaspoon ginger

Preheat your oven to 375 degrees. Line muffin cups with paper liners for the cupcakes (I bought some cute fall ones from Walmart for about $2). In a large bowl, cream the butter and sugar until blended. Beat in the eggs one at a time. In a separate medium-sized bowl, mix flour, baking powder, and salt. Alternate stirring the flour mixture and milk into the butter-sugar mixture, making sure its evenly blended. Stir in your vanilla extract and cinnamon. Bake in the oven for 18-20 minutes. 


BUTTERCREAM TIME

While the cupcakes are rising, blend your buttercream with the ginger. Scoop the mixture into a large zip-lock bag. Cut a small hole at one of the ends of the bag to use as a frosting applicator. :) BE CREATIVE! Swirls, roses, etc! You may want to refrigerate the frosting in the bag for about 30 minutes so the frosting will be a little stiffer. After your cupcakes have had time to cool, apply and ENJOY!


Thursday, October 24, 2013

Parmesan-Basil Encrusted Swai

It's been a while! I hope that you kids are doing well. Once again, things have been pretty hectic. Papers, homework, and studying for exams has consumed my life :/. I haven't had a lot of time to cook anything new lately. Actually, I've been eating out so frequently that one of the security guards at my apartment has dubbed me "The Jimmy Johns Girl." =_=. First of all, I feel like she could have been way more creative with the nickname. I think that she just nicknamed me the thing that I happened to have that day. My overwhelming desire to go back to my given name was what prompted me to cook tonight. 

This recipe is really simple. Swai has a very mild flavor - not fishy at all like tilapia, so it takes well to lots of herbs and spices. Personally, I like softer fish so I tend to bake my swai. However, it can be breaded, fried, grilled, you name it! Experiment! This recipe has a peppery, creamy, sweet herbaceous taste to it. Here we go!


WHAT YOU NEED

4-5 large pieces of swai
1/2 cup grated Parmesan or Romano cheese (you know, the "shaky cheese")
1 1/2 teaspoon paprika
1/2 teaspoon dried basil
1/2 teaspoon cracked black pepper
1/4 teaspoon salt or to taste
Extra Virgin Olive Oil (for drizzling)


Preheat your oven to 400 degrees. Mix your parmesan, paprika, basil, cracked black pepper, and salt together. Feel free to taste the mixture before applying to the swai - this will allow you to make sure the mixture has a good balance of salt and pepper for your own taste.


 Drizzle olive oil over the top of your fish (you may want to rub it on the fish for a more even coating). Take each piece of swai and encrust the top of the fish with the mixture. Cover a 13-by-9-inch pan (whatever size works of you) with a piece of tin foil. Spray the tin foil with canola oil spray or coat with butter. 


Place the swai on the pan and bake for 20-25 minutes, until the swai coating is golden brown and fish is flaky. A
nd just like that, you're done! Enjoy!


Monday, October 7, 2013

Earl Grey Tea Cookies

Good day to you all! I hope that you had a fantastic weekend! I know I did! It's truly rewarding when you can find a few moments to not only relax, but to try out some new recipes. This past weekend, I had a craving for cookies and tea, so I decided to combine the two. I love earl grey tea - It's probably the fanciest thing that I drink. I like to pull out my monocle, handle bar mustache, and top hat when I drink it (if only :/). It's the smooth taste of bergamot and citrus oils that makes my weekends so special. Earl grey just adds a new level of richness to sugar cookies. Anyway, cookies!

.

WHAT YOU NEED:
2 3/4 cups all-purpose flour
1 teaspoon baking soda
1/2 teaspoon baking powder
1 cup butter or margarine, softened
1 1/2 cups white sugar
1 egg
1 teaspoon vanilla extract
2 tablespoons Earl Grey tea leaves, fine (or 6 tea bags full)


Preheat oven to 375 degrees F (190 degrees C).  In a small bowl, stir together flour, baking soda, and baking powder. Set aside.

In a larger bowl, cream the butter and sugar together until smooth. Beat in the egg, vanilla, and tea leaves. Gradually blend the dry ingredients into the butter-sugar mixture. Roll rounded tablespoons of dough into balls, and place onto un-greased cookie sheets. 
Bake 12-15 minutes or until golden brown. Let stand on cookie sheet for two minutes before serving. Enjoy with milk or a cup of earl grey tea!

I hope that you have a wonderful weekend and try to find some time to be fancy :)! 

Saturday, September 28, 2013

Cry Baby Cabbage >_< !


Hey party people!
  This week my taste buds were craving something spicy. You know, the kind of spicy that makes your eyes water! I also had a craving for cabbage which I haven't had since last year. So why not a spicy cabbage recipe? 
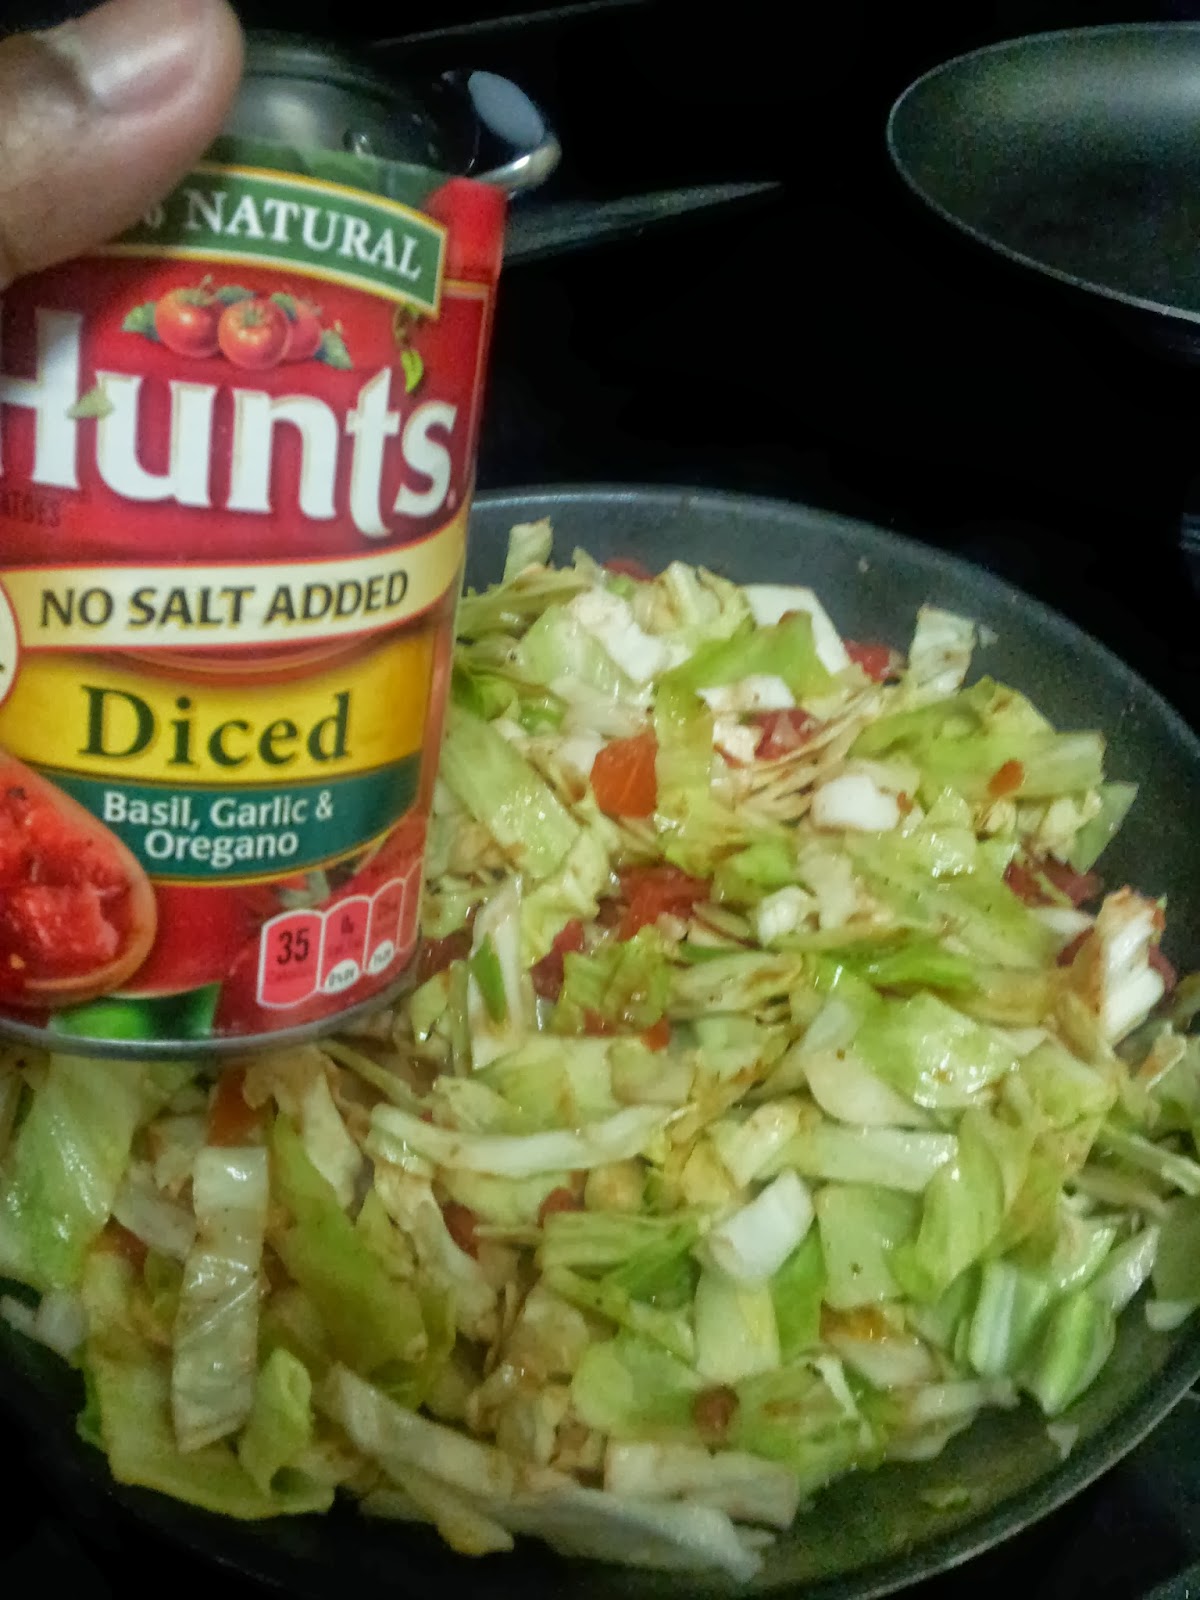
Originally, I wanted to make this dish with green chile-tomatoes instead of unsalted tomatoes. However, in the interest of not getting heartburn or high blood pressure, I decided to cut out the extra sodium. If this recipe isn't quite spicy enough for you, I would suggest upping the amount of sambal oelek or adding a pepper that's hotter than jalapenos. 

WHAT YOU NEED:
1 1/2 tablespoons of olive oil
1 large head of cabbage, diced
1 can diced unsalted tomatoes
1/4 cup of pickled jalapenos, diced (only use fresh if you can handle it!)
2 teaspoons of minced garlic
1 1/2 teaspoons of lemon pepper
1 tablespoon of sabal oelek (or 1 tablespoon of sriracha)
salt to taste (you shouldn't need much)


First, set stove top burner to medium heat. Pour the olive oil into the pan and allow it to heat up. Dice your cabbage into small strips and add to the pan. Try not to burn yourself! Incorporate the tomatoes and stir until coated in the oil. 


Dice your jalapenos (or pepper of choice) and add them to the tomato-cabbage mixture along with the garlic and lemon pepper. Once the cabbage has been cooking for about 10 minutes, add the first tablespoon of sambal oelek and stir into the mixture. TASTE BEFORE ADDING MORE. If the mixture isn't spicy enough, add an additional 1/2 tablespoons of sambal oelek until it reaches your desired heat level.


And voila! A nice, tangy, spicy cabbage dish to satisfy your taste bud's sense of adventure. 


Thanks for reading and see you next time!


Saturday, September 7, 2013

Blueberry-Ginger-Rum Muffins

Greetings good people! It's only 2 weeks into the fall semester and I'm burnt out =_=. You know that feeling: You go to sleep at 2am, not because you were studying, but because you were watching Breaking Bad. You think to yourself "yeah, I can finish those last 12 pages of class reading if I wake up at 7am. 5 hours of sleep is plenty." Wishful thinking. You wake up dead tired and can't focus enough to meditate on what Justice Scalia or some other guy is rambling about. You rush off to class unprepared, praying that you won't be called on. These muffins will give you a nice kick in the morning when you have that last minute reading to finish or a looming deadline. I'm not saying that you should abandon the coffee, but you should definitely be in a better mood in the mornings, ready to tackle homework, after eating these muffins:).


WHAT YOU NEED:
A. 1 1/2 cups all-purpose flour
B. 3/4 cup white sugar
C. 1/2 teaspoon salt
D. 2 teaspoons baking powder
E. 1/3 cup vegetable oil
F. 1 egg
G. 1/3 cup milk
1 cup fresh blueberries
3 tablespoons of chopped ginger
1 teaspoon of white sugar or until sweet (for the ginger)
1 teaspoon of imitation rum
1 teaspoon of vanilla extract

Preheat oven to 400 degrees F. Combine ingredients A through D. Place vegetable oil (E) into a 1 cup measuring cup; add the egg (F) and enough milk (G) to fill the cup. Mix this with the flour mixture. If the mixture seems too stiff/thick, add about 1-2 more teaspoons of milk. Mix your ginger with the 1 teaspoon of sugar or until sweet. Stir your ginger-sugar mixture, imitation rum, and vanilla extract into the batter. Fold in the blueberries with the mixture.  (200 degrees C). 


Grease muffin cups and fill about 3/4ths full. Bake for 20 to 25 minutes in the oven, or until a knife comes out clean.


And VIOLA! Deliciously, spicy, rich, fruity, creamy, non-alcoholic muffins. If your muffins are a little too tart because of the blueberries, pat the top of the muffins with a damp paper towel and coat in sugar.


Enjoy the day and I'll see you next week!

Tuesday, August 13, 2013

Basil Ice Cubes: RIP Basil Plant #2

AFTERNOON ALL :(. I woke up this morning to a brightly shinning sun, the sound of birds chirping (actually, it was probably the sound of sirens since it's Baltimore =_=) and A DYING BASIL PLANT.

While I love the taste of fresh basil, I am at my wits ends with dying plants. It's really difficult to grow fresh basil, or oregano/rosemary for that matter, in an apartment when your unit doesn't face the sun. This idea has been done to death on multiple food blogs, but I figured that you lovely people wouldn't mind if I show you how I made my own basil ice cubes :) Also, mine are in the shape of stars so that makes them special, right?


You can freeze your basil in either olive oil or water. I've decided not to use olive oil for this particular batch because I want to be able to use these cubes in desserts and smoothies. A mouth full of olive oil in my strawberry smoothie? No thanks. On to the ice cubes!


STEP #1: WASH IT


Self explanatory. Thoroughly wash/rinse your basil to get rid of any remaining dirt. Also make sure to pull off any dried out/wilted portions before blending.


STEP #2: BLEND IT


I used about 1 cup of basil and 1/2 cup of water. You can either use a blender or food processor to blend your basil-water mixture. Alternatively, you can chop the basil into fine pieces by hand. Blend your mixture for about 4-6 seconds until the pieces are evenly chopped and are about the size of rice grains. Don't worry about using too much water, it will evaporate when you cook the basil :) 


STEP #3: POUR IT

My particularly awesome ice cube tray holds about 1 tablespoon of liquid in each section. Make sure to keep track of how much each basil-water cube holds when you finally cook it. Personally, I don't think that there can ever be enough basil in a dish - it's delicious!


STEP #4: FREEZE IT

Allow your basil-water mixture to set in your freezer for about 2-3 hours. DO NOT leave it sitting in the ice cube tray for too long or it won't stay fresh. Pop out the cubes and prepare to bag them.

STEP #5: BAG IT!

Place your cubes in a freezer bag and label it with the date that you created the mixture. The cubes should stay fresh for up to 6 months. You can use this process for oregano, rosemary, and other herbs. Try experimenting with freezing your herbs in olive oil too!

**If you're a 1L student living in on or off campus housing near one of the law schools in Baltimore, the chances of you having a car are slim. I know that I didn't and neither did the vast majority of my friends last year. Freezing your basil or other herbs can be a wonderful idea if you seldom find chances to get to a grocery store.


Thanks for reading and I'll see you all next week!


**UPDATE** This post was featured in People Magazine's online article 12 Flavored Ice Cube Recipes That Make A Splash!


Recipes & Spotlight Entires

Hello All! I just wanted to let you kiddies know that once the school year starts (yay 2L!) in September, I will be updating this blog with recipes every week on Fridays or Saturdays. Assuming that I won't be crush by the weight of thousand page cases, I will try to post spotlight entries on nutrition/spices & herbs/fun kitchen ideas on Tuesdays or Wednesdays. Thanks for readings and here's to blog consistency! 

Saturday, August 10, 2013

Vanilla Soaked Apple-Cinnamon-Oat Muffins

GREETINGS!
I hope that you're all having a FANTASTIC weekend with beautiful weather, light traffic, and rewarding naps. If you're in Baltimore this weekend, then you know that the annual anime convention, Otakon is in town wreaking havoc on cross-walks and sidewalks near Inner Harbor! I had the pleasure of witnessing some kind of battle between characters in a parking deck. Pretty sure that I heard someone scream "LET THIS BE OUR FINAL BATTLE!" - or maybe I made that part up.. who knows. 


Onward to the muffins! This recipe was inspired by apple picking season! I've never been apple picking before, but I'm sure that it's a cathartic experience that changes lives for the better. For popular orchards near Washington DC that have great quality apples ready for picking, follow this link


WHAT YOU NEED:
A. 1 1/2 teaspoon vanilla extract
B. 2 medium-sized apples
C. 1-1/2 cups quick-cooking oats
D. 1-1/4 cups all-purpose flour
E. 1/2 cup packed brown sugar
F. 1 teaspoon baking powder
G. 3/4 teaspoon baking soda
H. 3/4 teaspoon ground cinnamon
I. 1/2 teaspoon salt
J. 1 cup unsweetened applesauce
K. 1/2 cup Almond Milk (Original)
L. 3 tablespoons canola oil (or olive oil-canola blend)
M. 1 egg white

Topping:
1/4 cup quick-cooking oats
1 tablespoon brown sugar
1/4 teaspoon ground cinnamon


First things first...


Use a vegetable peeler to skin the apples. Cut as much of the apple off of the core as possible. Toss out the cores and dice the apple pieces evenly. However, if you don't dice them evenly, honestly, no one will notice- this ain't Top Chef. Put the diced apples into a small bowl and pour the vanilla over them. In order to make sure that the vanilla spreads to all of the apple pieces, use a spoon to stir the mixture. Let this mixture sit as you prepare the batter.


Tip: Use honey crisp or green apples if possible. They taste delicious in this mixture.


In a large bowl, mix ingredients C through I together.


In a separate bowl, take the vanilla soaked apples and mix them with ingredients J through M. Assuming that you're looking forward to some more mixing, stir the wet, apple mixture into the dry mixture. 


YOU'RE ALMOST DONE!

Fill the muffin cups coated with cooking spray (I use canola cooking spray) three-fourths full. Combine the topping ingredients and sprinkle the mixture over the batter in each muffin cup. Bake at 400° for 17-19 minutes or until a toothpick comes out clean.

Side note: Depending on the size of the muffin cups on your particular pan, your "muffin yield" (GREAT word) may be less than or greater than mine - 10 muffins. 


DRUM ROLL PLEASE...

DELICIOUS!! With the vanilla soaked apples, these muffins come out very moist. I've made these muffins before without the apples and I found them to be very thick - probably because of the oats. Also, the vanilla soaked baked apples inside add a welcomed, bright bite of fruit and a rich/warm vanilla flavor.


HOW TO PREVENT STALE MUFFINS

When I bake muffins, I like to make enough for the school week as a quick breakfast option. However, I've found that they become stale before Friday if I leave them on the counter in foil or plastic wrap. I suggest refrigerating them in a large plastic bag. If you make more than you can finish in a week, you may want to freeze the others in a freezer bag and warm them in the oven once you're ready to eat them. 


Thanks for reading, stay safe (anime characters walking around with cardboard swords near Otakon and whatnot), and enjoy the rest of your weekend!

Tuesday, August 6, 2013

Up and Running!

Hello and welcome! I will start posting my food-ventures in and out of the kitchen in a few short days. I guess that the 30 minutes that I took designing my blog layout could have been used to actually write a real blog post. Well, what's done is done. No looking back at time wasted! I hope you'll come back to visit this weekend and until then.. my blog page is pretty, riiiight? :)